
As most know, or if you don’t you will in short-order, I am all about saving time when it comes to things done here on my homestead. If something can be done quicker, less messier (it could be a word), or without a lot of unnecessary equipment, utensils or special gadgets – I am all about it … that is, if the results are good. So, when I happened upon this awesome way to peel hard-boiled eggs – which by the way – with 40 ducks I make a lot of, I was pretty excited about trying it. And I did. And it worked! And I haven’t looked back since; well I’ve “looked” back, I just haven’t peeled eggs the same way as before.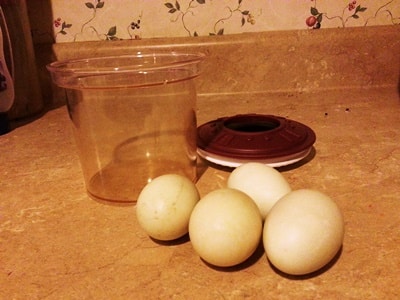
Now before I tell you about this marvelistic way of peeling eggs, let me tell you upfront I haven’t a clue about the science of what makes a perfect boiled egg. I’m not a science-y or physics type of person, I just want the results not the details of why. But I have heard some say, use 7-10 day old eggs, that fresh eggs will be hard to peel, refrigerate eggs for 10 days before cooking, let eggs warm to room temperature once you take them out to the refrigerator, don’t use eggs the first day they were purchased… See? It depends on who you ask. For me? This is my foolproof way to make hard-boiled eggs. No boiling and guess work for me – no wasted pot full of water. You can find out how I do it here.
 But I digress. Back to peeling. I will tell you I don’t adhere to any of the above recommended suggestions for my hard-boiled eggs. I have no time limit on how old the eggs are or if they have been refrigerated or left on the counter with the bloom still on (the coating that naturally comes on the farm eggs) – with the caveat that they need to be washed and cleaned thoroughly before cooking, but beyond that its easy-peezy street for me. So, once I have said boiled eggs in hand; whether from the refrigerator or newly cooled, I grab a hard shelled container or bowl (which usually means a container made of really hard plastic or a stainless steel bowl) and, either the hard lid that goes on the container or a glass/porcelain plate to cover the bowl.
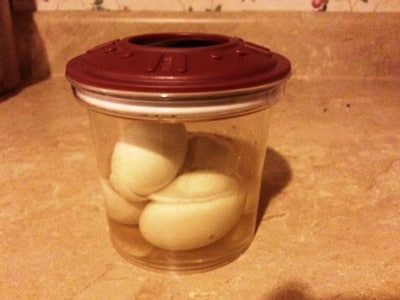
I then grab four (4) hard-boiled eggs, the reason I say four eggs is because that is the number of eggs that will fit in the particular container I am using for this PrepTorial™ at the time. If you have a bigger container … yep, you guessed it; you can put more eggs in it!
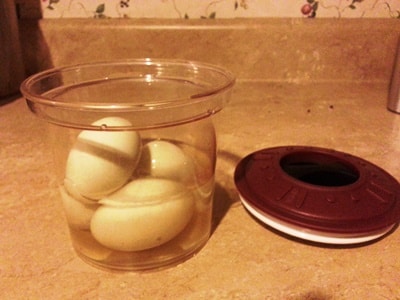
 Now, put the eggs in the container (or bowl) and fill it a good 2/3rd full – again I don’t have the science behind how much water to use … I just put water in the container of about this amount.
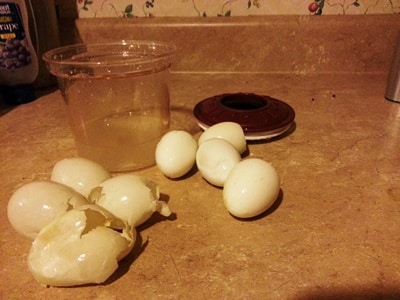
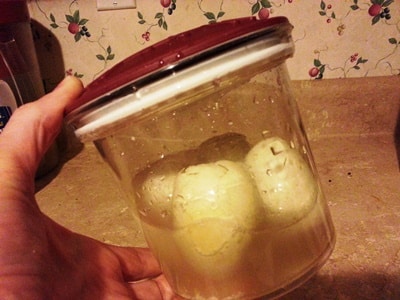
Once the water is in the container, place the lid back on the container; or if you are using a bowl place a saucer or plate over the bowl to make a lid. Then shake the container or bowl with both hands really, really, really hard … up and down … and sideways. In no time at all you will notice a different “feel” to the eggs. Once you remove the lid or plate, your eggs will look a little war-torn with saggy shell coats. Pick an egg up and this saggy shell coat should just peel right off like water rolls off a duck's back. But of course they would, wouldn’t they, after all I am using duck eggs! But not to worry … I use the same method – both for cooking and peeling – for my chicken eggs as well, so it’s all good!
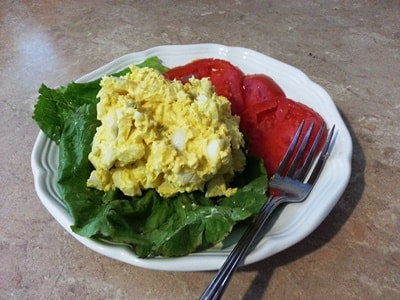 Egg salad anyone? Just sayin’.
– Survivor Jane

If you liked this … then you will love my book, "Emergency/Survival Hygiene: A Prepper "Cookbook" for Survival Personal Hygiene Products" and my NEW Book: "What Could Possibly Go Wrong??? How to Go From Completely Clueless to Totally Prepared"
If you have any questions, or would like to see a specific article addressing survival preparedness for women on Survivor Jane website click here > editorial@survivorjane.com)
For Sponsorship/Advertising Contact Information: sponsors@survivorjane.com
Follow me on Twitter @SurvivorJane and use the hashtag #PrepperTalk – Building the Largest Prepper Community One Social Media at a Time!