
I have been cutting hair; mine, since as long as I can remember. If there was a hair sticking up and wouldn’t lie down, I cut it. If my bangs were too long or were getting in my eyes, I cut them too. I’m sure, we all have probably experienced those times when it was you against your hair ... and you won; sort of. I know my mom sure did with my hair, and I have the first grade picture of me with bangs starting at one eyebrow and angling up across my forehead to an inch above the other eyebrow to prove it. Ah the memories.
Living on my homestead, money and being about an hour to an hour and a half of way from “real” civilization; i.e. shopping malls, great restaurants, and beauty salons, necessity became the mother of my invention; or at least of a good haircut. I remember watching as the stylist cut my hair in the past and thinking “I can do this”. I began mimicking how he/she cut my hair, to cut my own hair. Taking on the “hey it’ll grow back” attitude. 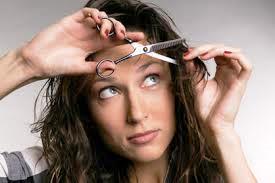
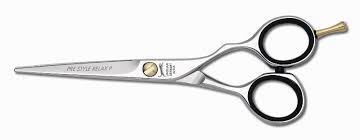
The key to the start of any successful hair cut is the scissors. I look at my haircutting scissors as yet another tool here on the homestead. And, I’m not talking your craft scissors either. You want quality stainless steel, with a good ergonomically design so they are comfortable in your hand, and a sharp blade. This doesn’t mean you have to go all hog-wild (homestead for paying a lot of money), there are quality scissors in the price range of $25 to $50 (the price of what one haircut usually costs), or watch for sales at beauty supply stores or on-line and you can get them cheaper. This is what I use Equinox Professional Razor Edge Series - Barber Hair Cutting Scissors/Shears - 6.5" Overall Length with Fine Adjustment Tension Screw - Japanese Stainless Steel - Lifetime Guarantee! Oh, and a comb too. I don’t have a special haircutting comb, I just use what I have handy at time time.
Now, here's a question that comes up a lot. Do you cut your hair wet or dry? Well, most of the time, I personally cut my hair dry. There are no surprises this way. I can actually see how my hair is going to lay, or curve around my face, or where volume is needed or bulk thinned out. Hair tends to shrink when you cut your hair wet. And trust me; it looks significantly different after it dries than what you thought it would. There are salons that actually specialize in dry cutting, opposed to the shampoo, plop in the chair and the stylist starts whacking away at your hair method. With dry cutting, the stylist will cut the hair dry, then wash and style it; or wash the hair, dry it and then cut. But what isn't cut is the price to your hair cut.. Because it can take anywhere from 45 minutes to an hour just to cut your hair; excluding the wash and dry, so the price is considerably more as well – a lot more, one of the many motivators for me to cut my own hair.
 Now at any given time I have shoulder length to mid shoulder-length hair. To make some quick layers I do what is called; for me that is, “The Pony-Tail” method. I make four (4) pony-tails; one on each side of my head, and two in the back (on either side), all at equal height, using coated elastic bands. Then, one at a time, I put another elastic band on a pony-tail, and pull the band down towards the ends holding the pony-tail straight out. As I move the band towards the end of the pony-tail, I can determine how much “layer” I want. The closer to the end you get the less the layers. I usually go about a half inch to an inch. Next, cut the hair section vertically (toward the sky/ceiling) with your scissor parallel to the elastic band and then repeat the process with the other pony-tails. If you want longer layers, have the pony-tails positioned higher on your head. For shorter layers, have them closer to ear height. Or, you can always pull all of your hair to the front of your head and make a frontal pony-tail at your forehead and then cut your hair at what ever your desired length (you might want to use an additional elastic band as a guide by sliding it down the pony-tail.)
Bangs are pretty easy to cut. I comb my bangs out, gather them up at the bridge of my nose, twist them and then cut straight across (not too much!) Then twist them back in the opposite direction and trim them up. Comb them down and see if they are at the level you want. If not, repeat the process. 
Next is what I call the “Head Tilt” method. Part your hair in the middle in the back and pull each section of hair to the front over your shoulders. You know like we do when we want to give the appearance of having a lot of hair in pictures? Take one section of your hair and tilt your head back. Then, using your fingers as a guide, (two fingers in front of the section, two in back) slowly move your fingers down until you reach the desired length. Cut from under your fingers across (horizontally). Remember to cut a little; you can always go back and cut more. Then repeat on the other side. When finished, look at both sections to make sure both are even.
There is nothing like a good hair trim, right? And think of the morale booster it will be, if and when, the poo ever hit the fan! To me there is just no excuse for looking shabby needlessly. There are lots of methods and tricks to cutting your hair, and like other preparedness skills, cutting your own hair and those of others needs to be practiced.
Just remember when cutting your hair … less is more! Oh, and it'll grown back! Just sayin’.
- Survivor Jane

Thank you for sharing Survivor Jane with all of your friends!
If you have any questions, or would like to see a specific article addressing survival preparedness for women on Survivor Jane website click here > editorial@survivorjane.com)
For Sponsorship/Advertising Contact Information: sponsors@survivorjane.com
Follow me on Twitter @SurvivorJane and use the hashtag #PrepperTalk - Building the Largest Prepper Community One Social Media at a Time!